

Showing posts with label food. Show all posts
Showing posts with label food. Show all posts
Monday, May 7, 2012
I sewed myself a dress! Hurrah!
I made myself a little dress yesterday/this morning. I think it came out pretty darn good for me to have never attempted such a project before. I will be making more for sure.. so I think this blog will be seeing a tutorial really soon-- if that is indeed something you would like to see.. let me know in the comments!
So.. without further procrastination, here it is. I'm wearing a shrug because I didn't want to hunt down a bra without straps. This dress also has small halter straps that can tuck in (which I have done here) or be worn tied around the neck. I will be doing an OOTD with this dress reallllly soon.. so I promise you will get a good idea of how it looks styled. Ignore the wet hair and no makeup.. I was fresh out of the shower and excited to try it on!
 I'm thinking of recreating this fun little jig for the wee ones in the world also!
Monday, January 16, 2012
Losing ALL the weight.. or trying?
So, I've been on this journey to a new me-- or some craziness such as that. I actually have a blog dedicated to it that is a joint effort with my friend Kim. We're doing it together. Perhaps I'll give you the link to that in a bit.. but I just thought I'd take a minute to share my "progress".
I guess I should start off by saying that I'm following a non-diet, diet. I'm really not making many adjustments.. because, well.. let's be real. I know. me. I will fail an epic fail of failures and I WILL

I guess I should start off by saying that I'm following a non-diet, diet. I'm really not making many adjustments.. because, well.. let's be real. I know. me. I will fail an epic fail of failures and I WILL

(picture source: http://memecrunch.com/meme/5RU/eat-all-the-food/image.png)
So.. given the fact that I know I will shape shift into a mama pig-- I'm still eating what I want.. I just say no sometimes. Being broke probably helps, because I stretch one or two meals out for a whole day and really eat tiny snacks if any at all.. so it's not quite the way I *want* to eat for weight loss.. but for now it must do.
I'm not going to post all of the minor details, because like I said.. it's laid out in a blog already.. and why type things twice-- that may actually exercise my fingers, and I already completed my Jillian Michaels for the night.
So far I've lost 6 inches off of my stomach.. and roughly 3 from my hips.. most of my other stats haven't moved much, so those are the noteworthy ones. The thing is.. I can't really tell. Some of my pants fall down when I walk-- but I've always had that problem because I have a big white girl butt, but I think some of it is related to the inches lost. I also can now fit into our patio chair that I couldn't get into without pain before. It still cuts into my fatness.. but hey.. I can sit in it so GLORY BE!
So.. anyway, this isn't crafty.. it isn't well written.. it's just a note. A note to say that I'm trying, and even thought people will judge me, doubt me and say what they may.. I'm doing it for me, not them..
DANGIT.
With that said.. I must go craft onward.
I promise I have some more crafty things coming soon!!
I promise I have some more crafty things coming soon!!
<3 Ash
Sunday, January 8, 2012
Artsee Time: Brown Sugar Scrub
Ooooh man, the epic failure that I am is just horrendous! I promised the Brown Sugar Scrub a few days ago and still have yet to deliver-- welll...
Here it is!
What you'll need:

Brown Sugar, White Sugar, Vanilla (Almond would be even better.. but this was all on hand stuff), Olive Oil, a measuring type of contraption, a spoon and a jar or something for your scrub to go in.
This is the easiest thing in the world, literally.
Equal parts of the Sugars. I actually do a LITTLE less white sugar, but you don't have to.
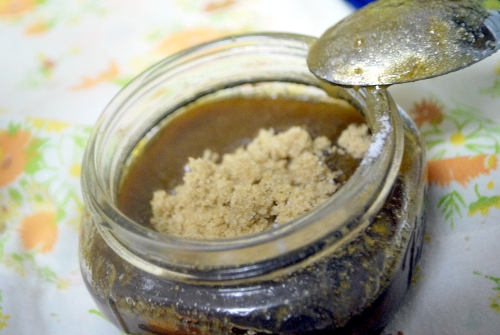
Then you want to pour enough of the oil to lubricate your solution. I let mine run down slowly as seen here:

You will also add your vanilla/almond extract into it. This is primarily for smell.
Then you mix it up-- mine was a little too soupy, so I added a little more sugar!
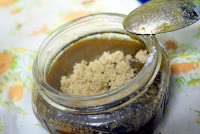
Voila! Presto magic!!
I use this now instead of my much more expensive brown sugar scrub that I was getting at a local discount store (it closed, so this is probably a good thing that I have this now).
I do recommend when making it for yourself to keep your batches smaller. This will last me about 2 weeks.. and that's about as long as you'd want to keep it handy before ditching it.
The great thing about this is that it's completely natural, and if I had the money I would have used all farmer's market items-- but you know, we be broke 'round these parts-- so I buy generic instead :D
Enjoy this excellent gift to someone you love, or to yourself!!
Here it is!
What you'll need:

Brown Sugar, White Sugar, Vanilla (Almond would be even better.. but this was all on hand stuff), Olive Oil, a measuring type of contraption, a spoon and a jar or something for your scrub to go in.
This is the easiest thing in the world, literally.
Equal parts of the Sugars. I actually do a LITTLE less white sugar, but you don't have to.
Then you want to pour enough of the oil to lubricate your solution. I let mine run down slowly as seen here:

You will also add your vanilla/almond extract into it. This is primarily for smell.
Then you mix it up-- mine was a little too soupy, so I added a little more sugar!
Voila! Presto magic!!
I use this now instead of my much more expensive brown sugar scrub that I was getting at a local discount store (it closed, so this is probably a good thing that I have this now).
I do recommend when making it for yourself to keep your batches smaller. This will last me about 2 weeks.. and that's about as long as you'd want to keep it handy before ditching it.
The great thing about this is that it's completely natural, and if I had the money I would have used all farmer's market items-- but you know, we be broke 'round these parts-- so I buy generic instead :D
Enjoy this excellent gift to someone you love, or to yourself!!
Tuesday, January 3, 2012
Artsee Time: Scrapbook Coasters
Whats up all my lovely blogeoples!? <-- That's not even a cool made up word, kinda sad really. I'll do better, I gotta do better than that.
Here's a quick little, CHEAP project for you to do. It makes a fantastical gift, or something nice to brighten up your own abode.
It's... drumroll---------------------------------
COASTERS! WQOOOOOOWEOIUDFOGDJHGSOI!!!!
So exiciting right???
Okay.. so anyway, 12 year old girl typing aside-- here's your supply list.
Modge Podge
Scissors
Tile squares (literally >$1 at Lowe's!)
Paintbrush type of thing
Ruler of sorts
Marking tool
Paint (optional)
Decorative paper (or newspaper, ticket stubs, stickers.. whatever you want to use as your "coaster")
Felt or cork for the bottom of the tile
...and the photo proof that those are what you need!

Now.. as far as directions go, it's pretty simple. You measure your paper (being mindful of the actual image that will be on your coaster) to fit your tile piece. My tile was actually a teeeeeensy bit larger than 4x4. I wanted a slight lip around my paper because I chose a tile color that coordinated, so I decided to cut mine 4x4.
I do need to add here though, that if you want to paint a rim around your coaster now is the time to do it. I didn't take pictures of it, but I chose to paint a brown trim on the raw edges. The best part about this coated tile is that if you are fast with it, you can wipe it right off to get a clean finish.

Okay, so you're painted up and ready to rock and roll. What you want to do next is to coat your paper on the back with your Modge Podge and place it down.. then you want to coat the top as well. This is the part that would make having one of those scrapbooking rollers handy-- but I don't have one so I left that out :P

Awesome. Do that another time or two, until you are satisfied with your coating (I did a healthy coat the first time so I didn't need to do it twice)...
Now.. once it's dry, add your stoppers on the bottom. I will be E6000'ing some felt to the bottom because I forgot to do that.
Rock on crafty craftersons.. Rock On.

Whatcha Got Cookin: Cheeeesy Chicken & Rice Casserole
Oooh Pinterest, How I love thee.
Here is a recipe that I tweaked after finding a version on everyone's favorite online corkboard. I took out a lot (because my household is picky) and used things that kept it gluten free (you'll soon learn that we are on the quest for gluten free-ness)
So, I give you the world's most flexible recipe. You can add what you want, take out what you want.. and eat it SO many ways. This is a brilliant dupe for Moe's Southwest Grill's burrio fillers if you choose to do so.. but half of the time we throw it in a bowl and call ourselves fed.
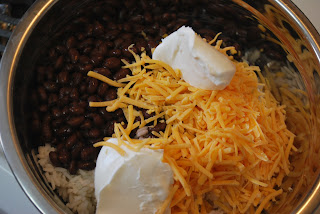
So.. here you have:
Black Beans
Cheese
Rice
Shredded Chicken
Sour Cream
Not Pictured: Milk
So.. that's really it. One thing I love about this is that you can use leftover chicken if you want. You could use beef. You can do WHATEVA YOU WANT ! !!
I don't measure, so that's a downfall of sharing I suppose, but aside from the chicken that is under everything else, you can pretty much eyeball it. I used a whole bag of cheese (the standard bag).. but I kept about half out to cover it with before cooking.

So thaar she blows. Not the most elegant presentation (as the photos were a last minute thought).. and YES I USE FOIL ON EVERYTHING !!! 111!! :D
I also did A poor job at foiling my pan, but dang we were hungry and things like that can't wait.
So.. there it is, ready to eat however you choose. We ate it in bowls for lunch, and make tacos out of it for dinner. It's cheap, easy, and gluten free.
Some ideas to make it better?
Add in some of the following:
Salsa
Corn
Cook tortilla chips into it
You get the idea.. we went with what we had, because it was lunch as big girls can't wait for some grub... plus, the child won't let you forget he's hungry, until he's no longer hungry.
Let me know if you cook this, I'd love to hear what YOUR family put in it & how it turned out! :)
Rock On & Peace Out,
xoxo Ash
Subscribe to:
Posts (Atom)